5 Tips for working from home

Not really working here but working on this blog page

Hi everyone!

So you’re all trapped in your houses and trying to present a professional and “normal” service?

This method of working had only crossed your mind in your wildest dreams or nightmares right?

Well I’ve been doing this for years with the work I perform (remote webex configurations or newly install appliance products, normally in remote customer datacentres).

However while my role allows for a scheduled nature and means sitting for hours in front of a laptop, my role isn’t made any different by being at home, a boat, back garden shed or in the office because I’ve adopted certain methods of working.

I wanted to share some to help anyone else and I’m sure many others can share theirs too.

Tip 1:  You’re the company.  

Not the office, not the fancy clothes, not the new haircut – your skills.

You’re where you are today because you do a great job, you’re motivated and you’re really appreciated.

Yes, if you’re in a video conference – be clothed 🙂

However, generally I try to make sure that I’m not sat next to the doorbell and other loud noises as this, while acceptable mostly, isn’t great if you actually need to hear others.

Tip 2: You have a laptop right? 

However health and safety says you shouldn’t sit in front of a laptop for too long as it can cause many nasty things (headaches, back ache, neck ache – the list is horrid) and this forms much of your workstation safety training but they didn’t expect you to only be able to work on the laptop right?

So while the company offers you a screen and other docking station items, your aim shouldn’t be to recreate a place to sit and stare at your screen(s).

I do a generally solitary role (as do my colleagues) but I also need to be seated for up to 5 hours while in a webex with customers.

To this end, if I’m not actively engaged in using the laptop, I’m away from my “desk”.

This means that I can go do other things while monitoring for emails and other items like Instant Messages etc.

Tip 3: Tech is your friend.  

However it is only a bunch of tools.  Just like any other job (plumber, electrician etc) so you need to think like that about them.

Many company documents are public and online, so use your own favourite tech to check websites and get away from that laptop ?‍? 

Here’s a list of tools and how they can be used:

  • Laptop – webex, business system access (VPN, VOIP etc).  If you don’t have a company mobile, substitute laptop for mobile from here on in and remember – your laptop has a battery, is just a bigger phone and moves too.
  • Mobile phone (if you have a company one) – email, instant messaging, calls, texts, photo sharing (basically everything a laptop does except VPN / Business system).
  • Wifi: during this time, your home wifi will be contended by every home schooled game console owning child in your region AND everyone’s business traffic.This is seen throughout the world but mainly seems to be functioning.

I strongly recommend getting a MyFi device (a wifi providing mobile internet (3/4/5G) device) as this will allow you to “drop off” the home network and potentially get around contention issues.  You’ll appreciate it much more when lockdown ends and you can sail off using it and still be “working from home”.

If you have a good enough personal mobile phone and package, you can generally get by with 30GB a month data sharing on your phone.

Basically, enable your phone’s hotspot and connect your laptop (make sure to be mindful of your data use and most mobile providers have an app to monitor that).

  • Headset – probably one of the most used items in your work from home arsenal and you can utilise it in ways you probably haven’t thought of.

As an example.  Some headsets now come with the ability to connect to two Bluetooth sources at the same time.

This is great news for the home working masses.

If you’re using your laptop then the headset appears like a normal tool for calls etc.  However, also connect it to a music source or tv and watch / listen to music.

When the laptop gets an email, it’ll break the audio and tell you.

Tip 4: Plan to take breaks.  

In the office you may have written an email, sent it and got up to get a coffee. Stopping in on your helpful coworker for a quick “hey! You ok?” Type of conversation.  

Well you don’t have the coworker now to stop by but you can get up, get coffee, take a quick look at what’s for the next meal, make a list of groceries and then get back to your work.

Taking regular breaks will help you stay mentally healthy.  Moving will pump blood, your eyes will need to refocus on different distances and you have got a “home task” started or done.

Tip 5:  Loneliness

You’re not really alone.  Everyone is pretty much in the same state at the moment – globally.

So accept that things will potentially drop through the cracks, the boss won’t say hello for days, the coworkers that make coffees and teas together with aren’t about.

This is sad if you’re missing these things.  However there are things you can do to reduce this.

Make use of, create or just make a pack with your coworkers that you’ll all check in daily (maybe even more than once a day) and stick to it.

Routine is the key here.  We all need to be available at the times we normally keep but we can and should make time to have those little chats to coworkers too.  

They only need to be the sort of things like “what are you doing?” and the answer doesn’t always need to be work related – it wouldn’t in the office?  “I’ve been watching boxsets, working out and making my next shopping list” should be perfectly acceptable too right?

Conclusion 

The whole world is with you.  

You’re not alone.  

You have the tools to be magnificent in times of upheaval but the company NEEDS you to be healthy, happy and customers feel the same.  

Yes there are pressures to solve this, research that, tests to run, diagnoses and resolutions to be had.  

None of them matter if YOU aren’t ok.

To end, I just want to share my work methods with you via an example day in my role:

I work, as I said, in configuration, installation and some hardware upgrades on a scheduled basis.I’m in a proactive role, not a reactive one so some things will seem odd to the reactive crowd.

I generally work 7.5 hours a day.

I “start” at 7am most days (I’m actually blessed by knowing what the next days schedule is before I sign off each day) and so I’m up and dressed with a coffee in hand by then.

The first tool I pick up is my company mobile (which has been charging all night) and sit at the breakfast table while check my email and calendar for the days events.

I boot my laptop, sign in and open the applications I need for the day (normally a pdf or two, business system and email).  I may not need them just yet but they’re then plugged in and left (locked) until I need the laptop.

Once breakfast is done (general conversations with other lockdownees), I respond to any emails I need via my phone and connect my headset to my company mobile and my personal mobile.

I will then go about my day to day routine, work, housework, work, respond to IM etc while listening to either music, learning a skill online or something else on my personal phone.

As I explained before, I am still fully available at all times and because the notifications come from my work phone to the headset, I have no troubles.

With regards to my wife who also works at home now, my step son playing d&d, when not working or college work and my step daughter shouting at the latest YouTube craze – I find a place to work and have done now for circa 10 years (both current role and previous).

Remember; boring people get bored.

Outside of this, I found that if I find a hobby, I’d be happier.  In this lockdown world, I found that making a website and YouTube videos gives me entertainment of an evening and I welcome you to join in www.linked2u.co.uk where I’ve been making and filming / blogging various hobbies I’ve tried out.

Stay safe and well all!

Blue Tit Nest Box Offcuts Project

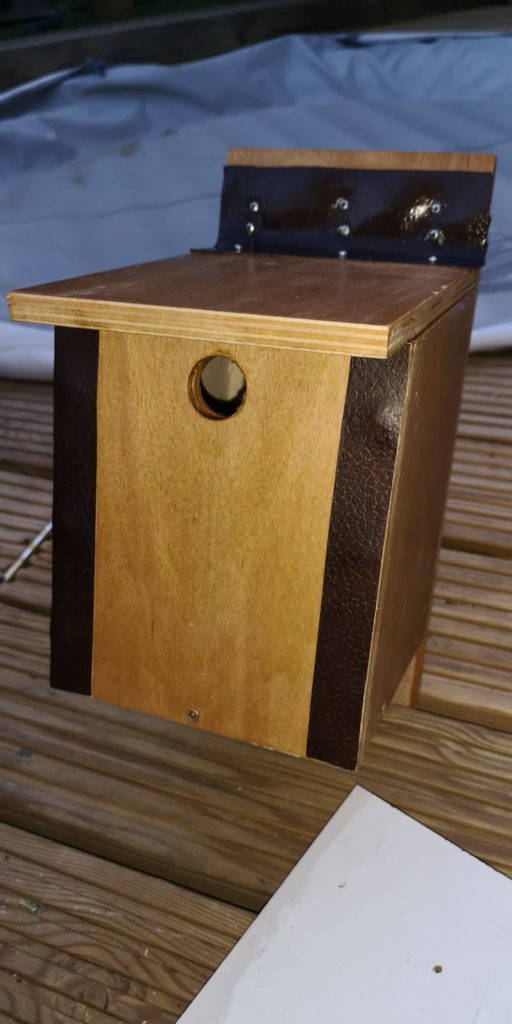
The Blue Tit Nest Box


“I need a new box for my Tits to go in”

she said. She meant the blue tits that live in her current nest box.


“Ok”.  “I need projects for my blog and YouTube channel”.

I said.

So here we are.  Needing to make a nest box and not knowing what’s best for the type of birds were looking to house.

If you’re in a rush, skip to the end to see the “Make your own” section.

The homework

First stop was www.bto.org as they were providing a worksheet on the Blue Tit and making a nest box.  Perfect as while I could draw a nest box, work out dimensions best for the target bird etc but seeing as it’s all done, I’ll credit bto.org and use theirs ?

Lessons learned from first YouTube video

I’m my first video, I had recorded 2.5 hours of build time which I had to shoehorn into 10 minutes.  This wasn’t easy as I had lots on footage that really needed more time to show the viewer what was actually being done.

Much of the edit process requires speed changing of each video to make sure that the segment doesn’t draw out and get boring.
A cool thing I found is that with an Apple iPad or iPhone, you can use Bluetooth headphones to start and stop the recording.  This is brilliant for doing something or staging and then hitting record and stop.

I found it equally time-consuming if you record multiple videos (Bluetooth start and stop to reduce editing) or longer videos that you then need to trim down, sometimes even cut out the bit when you ran away to find a clamp for a second or two.  All that procrastination cost you in the edit room.

Filming Tips

Another good tip is make sure power is available to keep the recording running and much more importantly, check your data storage.

I was happily recording this video, pressing my Bluetooth button and filming the next part.  However, I couldn’t see the screen of the iPad and it had run out of storage! AHH! Make sure you monitor this.

The iPad is years old and has photos and videos on it from a 13 year old girl that likes to re-enact the randomness she sees on YouTube.  I’d like to see the parody of my videos ?

From then on, I’d record some and then upload it via USB to my laptop. This seemed to be ok as I just did this when having a break.

Making the box itself

I tried to show in the video that I had a worksheet from bto.org and some 12mm offcuts of hardwood ply.

Typically (according to instructions) the box should be made with 15mm as a minimum but this is an offcuts project.  To hand will do.

Common sense suggests that ply won’t last long in our UK climate but  I don’t mind if the birds don’t for a year.

Besides some good quality outdoor varnish should protect it from the worst of UK weather.

Marking out

The first actual making step is to mark out the dimensions of each piece on the wood.  So looking at the diagram and cutting list, I could see it was all 150mm, so I set about marking the two offcuts I had to 150mm.

These were then cut on the table saw and left me 6 X 150mm wide boards. Each of these boards had a job and currently they were all 300mm long.

I marked out the roof, bottom, top, back and the sides.  The sides are angles so I’d need to use a mitre to cut them on my table saw.

I like to draw all my marking lines through.  By this I mean join them from one mark to the other and create a visual line. This isn’t needed on a table saw but I use it an additional safety feature as if the line is t passing through the blade correctly, I can see at that line.  This provides the option of glancing from fence to cut line and means mistakes can be avoided.

Once all the parts were marked, I set to cutting them.  Each one needed the fence moving between each cut but the marks I made on each meant that lining up the line with the blade while butted up to the fence was easy and quick.

Once all were cut, I did a dry run assembly.  There aren’t any tricky joinery or fixings on this project but it does call for a “notch” to be made in the back part.

The notch is to receive the edge of the roof when closed.  This means that any water will run down the roof and off instead of pooling and rotting the wood / making nest wet. 

Making the notch

While I had the box assembly together, I marked were the roof would sit.  Then using those marks, I set my table saw depth .5mm high and ran the back over the saw a few times to the 12mm roof thickness.

After checking the assembly again, I set about pre-drilling some holes for the screws in the front, sides, back and bottom.  The bottom needs some drainage holes, so I drilled these too. The roof isn’t attached at this point.

I also made a 25mm hole close to the top of the front and at least 120mm from the box bottom.  This will help mum and dad keep the kids in.

The hole size is to keep larger Tits and other birds out.  A larger hole can be used but less likely to be used by blue tits as they get evicted.

It’s nearly done

Once I had attached all the parts, I then needed to work out how to attach the roof.

The instructions say using rubber is a good idea and I agree but I don’t stock much rubber ?

We do have some old leather that was a sofa covering.  I stripped the leather off before I disposed of the sofa some time ago.  I only needed a few strips.

On with the hinges!

I cut a piece of leather which was long enough to have 15mm on the back and 25mm on the roof, creating a hinge.  The hinge is fixed with expanding glue and also screwed down with short screws. I had to pre-drill holes in the leather as the screws made the leather twist in ugly ways. Left to dry, it seems to work fine.

The finish

To finish this project off, I wanted to give the wood some varnish.  It’s important only cover the outside of the box as the inside needs to remain natural as possible.  We don’t paint our cots (cribs) in lead paint, so we don’t put chemicals near baby birds ? simple.

Ok, so now it’s done.  It’ll be off to its new home sometime soon but maybe next year, it’ll see a young family.

Make your own

To make this project you will need the following:

  • Some wood of 15mm(or more) X 150mm X 1170mm.
  • The “Blue Tit Nest Box” from www.bto.org
  • Something to cut boards (tablesaw, chopsaw, handsaw, router, jigsaw, hand saw)
  • Something to cut notch for roof (tablesaw, chopsaw, chisel, router, a sharp knife? Etc)
  • Glue
  • Screws (lengths varied on my project but looking to not go through walls of wood).
  • Leather (of small hinges or rubber).
  • Some protective paint or stain for exterior.
  • Approximately 1.5 hours not including glue and varnish dry time.

Please let me know if you build this, if you have any suggestions on the blog here or the video.

What would you like to see made with offcuts?

Do you think the birds will like this new home?

Comments welcome here, on YouTube and on the Facebook page, so don’t be shy.

Stay safe all! ???

The Treasure Box

Collaboration – a real life example, a wooden box, some video editing, some amazing music and artwork.

Certainly worth a read during this lockdown.

Where to start?

Well, let me explain the goal here first, that may help?

The plan

The plan was a simple one.

  •  Try to gain traction for my Linked2U website.
  • Engage with and create engaging blog, video and Facebook presence.

But how?

I came up with a simple idea.  We are all (well those non-key workers etc) in lockdown, we can’t go out, see friends, have visitors etc.

So let’s do something – said my inner voice.

But what “something” I hear you ask.

Well I, like many others, have various materials laying about.  Be it wood offcuts, Amazon cardboard (other cardboard providers are available) and lots of time to kill.

I also have an interest in making things in general and a background in IT.  So the idea of meeting like minded people, making new friends and sharing our adventures in the “making with that to hand” seems like a good idea?

I’d never really done much YouTube either, so that was going to be a challenge.

Ok, so the plan is to ask folks (complete strangers) what they think I should learn, make and video / blog about?  Yep!  That’s about it.

What’s YouTube got to do with it?

Good question.

Those whom have read a bit of my blog will see that I recently (since lockdown started in UK) started watching a guy called Steve Ramsey (Google him, he is the wood working for mere mortals guy).

In one of his videos he calls the viewers to arms and show where they call “workshop” and what they’re up to.

This is where the lightbulb lit for me.  I have a website.  This blog.  Why not answer Steve and post here about his new YouTube follower?

Anyways, moving on a few days and I wanted to make something.

The box

I’m an old school kind of guy and find comfort in tried and tested.  To this end, I decided that whatever it was to be made would be as big as my offcuts would allow and would be simple.

Yeah, the box idea WAS simple but it got more complex.

I hadn’t planned a design, just grabbed what was to hand and enough of.

Then I set about working out how to video it.

I have a small camera that I got for my 3d printing and so rig that up.  Nice and high – hah! Well it was on the roof of the “workshop” and did give a great view of work being done.

The videoing

It isn’t easy.  I decided that if I had to, I’d record a voice over later, so I threw audio out straight away.  I’ll get to music later.

I got on with the task while the camera just kept recording.

I had plenty of video to work with but felt I’d need to limit to around 10 minute video for the end result.  I think that is wrong for this type of video but time will tell.

The accident

During the cutting of some thin strips of wood, I did manage to get myself a fat bloody lip and very very sore nose.

It still hurts now (2 days since happening).

The story goes, I had cut the wood I needed but saw the offcut heading toward the spinning blade.

Now I know that this was potentially a fast projectile possibly heading at me and with such a small amount of room in the “workshop”, I have to be super careful.

Well, there’s careful and there’s catching your push stick on the blade and it being ripped from your hand to play kiss kiss with your face before heading off for a rest.

I got the accident on film too but it’s not in the final YouTube release.

The editing

Oddly, I had a brief venture into the editing early on as the aforementioned accident, I felt, deserved a health warning type of video of its own (I may post it to YouTube channel).

So an hour after my accident, I was learning about transferring files via USB being slow via the camera etc and that my phone does a great job of text overlays and speed changes etc.

All in, I ended up with 2.5 hours of footage (granted there was a lot of “planning” filmed (I mean sitting about with coffee).

So the editing took a day.  Taking 2.5 hours to 10 minutes was a challenge.

If I’m honest, I could be better (and will probably) but I’m happy with the work done.

The music

So sound.

Let’s face it, we all know what a tablesaw sounds like.  Many hate it (like me… It forces a healthy respect for its power).

The decision, as I said, was not to voiceover.  Instead this is where that collaboration comes in.

A few years back, my eldest son became interested in music making.  The editing of, the laying of beats and more recently (now 17) he is producing music, songs, videos and amassing a great following (insert link to his YouTube).

So, I asked him nicely if I could use three of his tracks in the video.

Luckily he said yes and this provides a brilliant background accompany for the “action”.

I love the tunes and considering he was only a tike at the time, super proud daddy here!

The artwork

As for the title and credits artwork, collaboration again here.  My youngest is a photo editing super hero and whipped out those artworks in a matter of minutes.

I literally sent him a picture and some ideas and he was off to the races.

I am truly blessed to have such a wonderful family and not a day goes by without being thankful for them.

The result

Well

is the result and I welcome you to visit the Facebook page and comment on what you think I should make next or learn.

More photos

Not really mentioned here is the fact that this box is a treasure box for a reason.

The box was intended as a secret compartment box for my son’s 15rh birthday.

The story goes that he, being a teenager, would rather ask for nothing for his birthday than hold a long enough conversation to be able to determine what he may want.

So, to this end, the box was intended to house some cash and a few other bits in the main compartment.

The actual finished box had a hidden compartment / draw in the base.  To access it, you needed that small strip of wood you see me insert in the video while glueing up the box.

This strip has a nail in the end and when poked through a hole made in the bottom of the box, pushes a lever that then allows the draw to open.

I thought it would make a nice present and was interesting to make.

There are very few images though as the box needed to be shipped off to my son in time for his birthday.

Then problems then started.

The potentially lost treasure box

I needed to ship this box.  I filled it with some goodies.  I put a short story in the box that alluded to the compartment and wrapped it in cardboard, with loads of brown parcel tape.

Once wrapped and I’d paid for the postage online, I set off to find a drop box.

For those not aware, a drop box is a post box that takes small packages for shipping.  Pay online, stick a label on the parcel and drop in a box.  Magically it arrives at the destination.

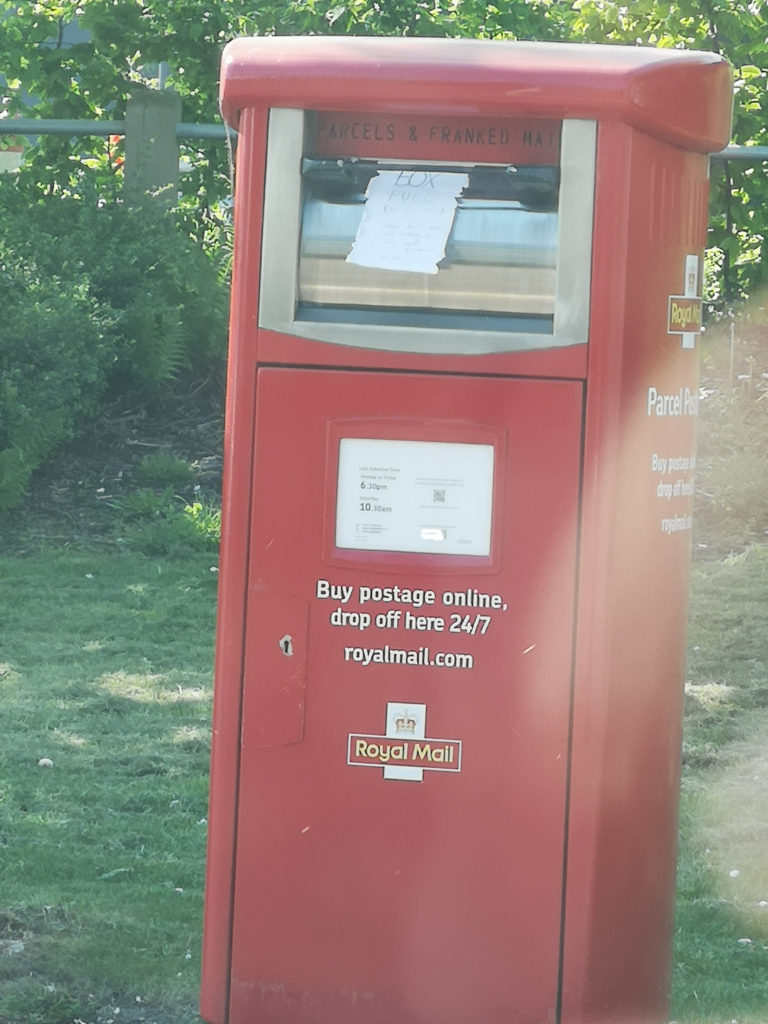
Buuut.  The drop box allowed me to put the box in and the mechanism slide shut to trap my handmade beloved box between the drop box holding areas and the opening mechanism.  My box had become a doorstop!!!

Some panic calls later and all that could be done was leave a note on the drop box machine begging the next potential user to not smash the parcel / box up.  I’m not hopeful.

Needless to say, the box may be lost, may be broken, may be perfectly fine but I have never felt so annoyed at an inanimate object as I was staring at the loss in front of me.

Get over it!  I tell myself, have the video online and that’s fine.

What else you got planned? ?

Visit the Facebook page and let me know (there should be a Facebook icon around here somewhere?)

Don’t forget the newsletter signup – I don’t spam, I will send you a roundup occasionally in case you forget to come back

https://www.facebook.com/linked2u.co.uk/

I’ve gone YouTube! – The Press Box

So what is so cool about Steve? well let me tell you.

It was (is) 2020 and we (the planet pretty much) is lockdown due to the COVID-19 outbreak.

Steve is a seasoned YouTube creator and has been running woodworking for mere mortals for some time.

Just before the “outbreak”, I had treated myself to a much wanted tablesaw.  A cheap one (as saws go) but I had been watching it’s price drop since last year and the stock of them in my local Wickes store.

Anyways, I stumbled upon Steve as I searched for tablesaw and usage videos.  It looked to me like he had just started the same lockdown I had been in for a few weeks already (work from home, hadn’t been out for a few weeks before UK shutdown).

So I began to watch Steve set about making a printer stand and learned quite a few useful things along the way – like people make mistakes but you just learn and move on.

To make a long story longer, I had (have) just watched Day 22 of his lockdown videos and he asked us what we do in our workshops and if we are making anything now etc.

Well Steve, here is my effort.

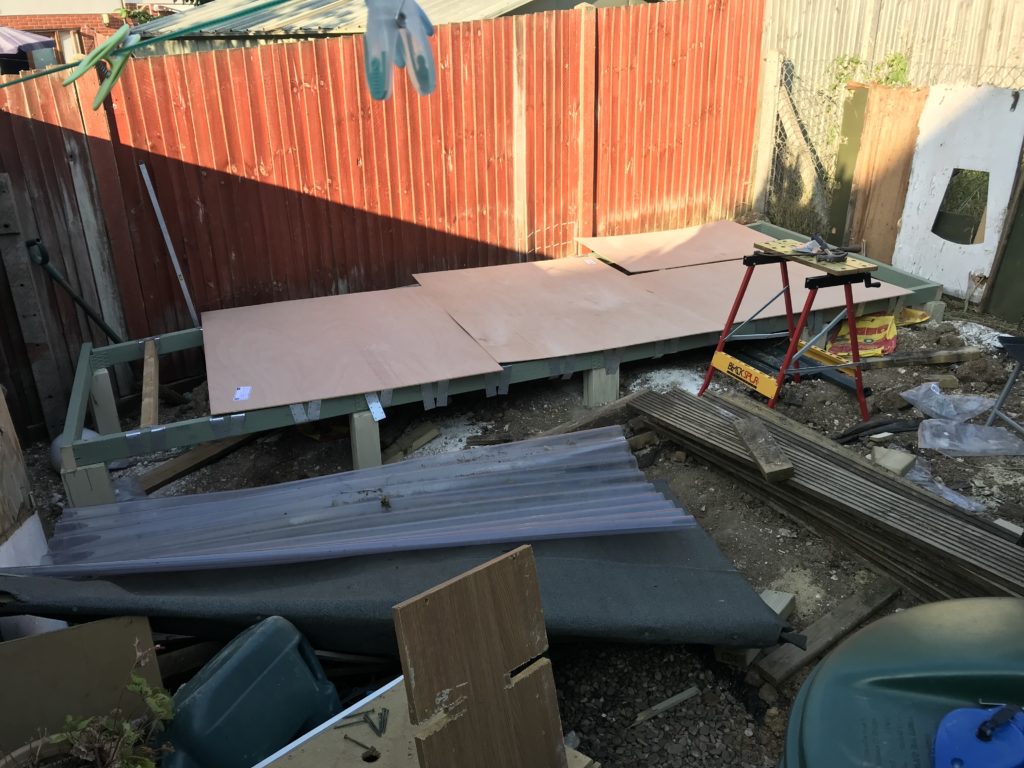
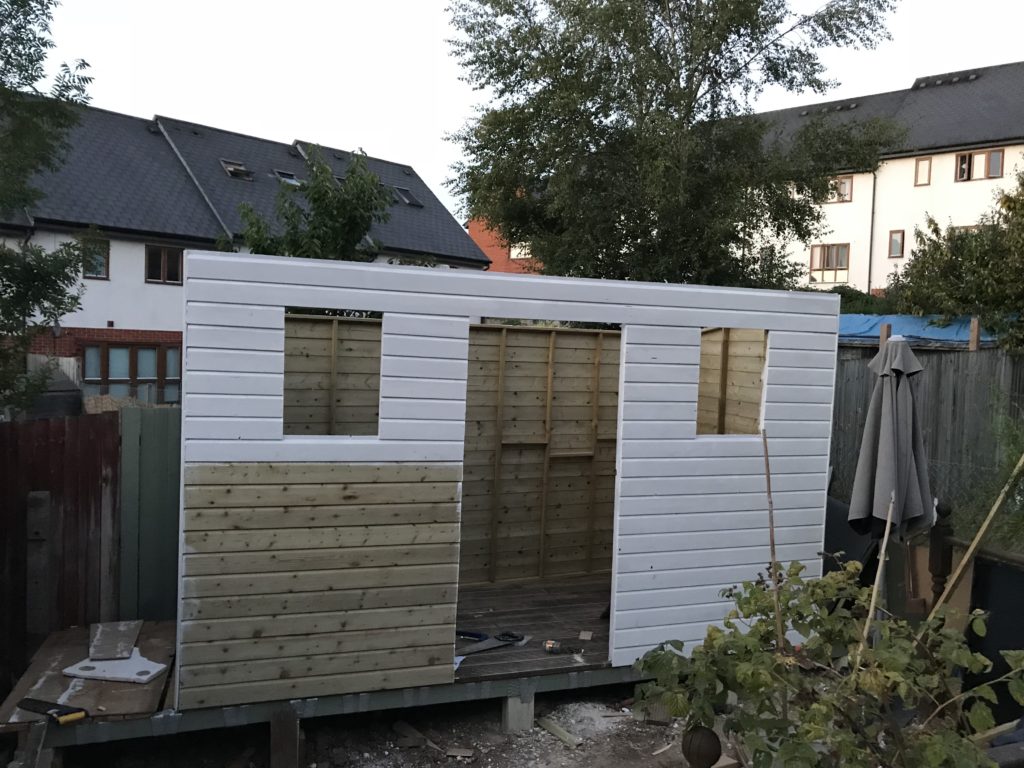
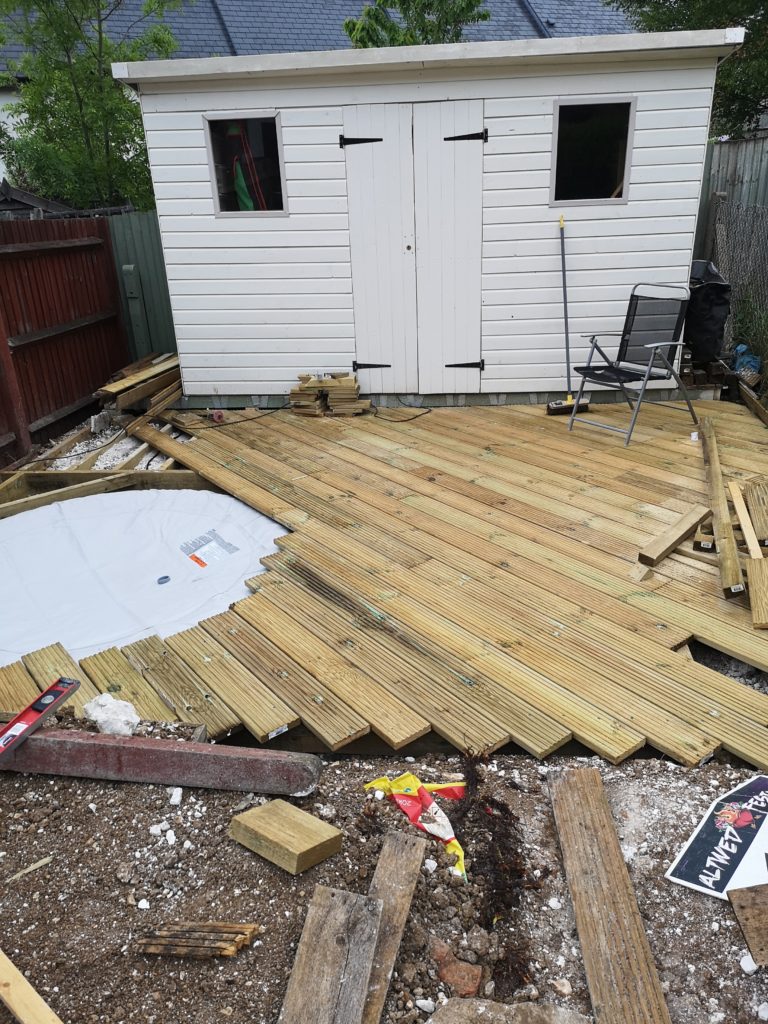
The "Workshop" Tour (Constructed July 2018)

First the “WorkShop” isn’t really a workshop.  In fact after factoring in the amount of “stuff” that a shed collects, the new tablesaw and a stool to sit on, I have very little room to move.

You can see that is it an odd shape too.  It’s wider on the right hand side.

So what to make in LockDown2020?

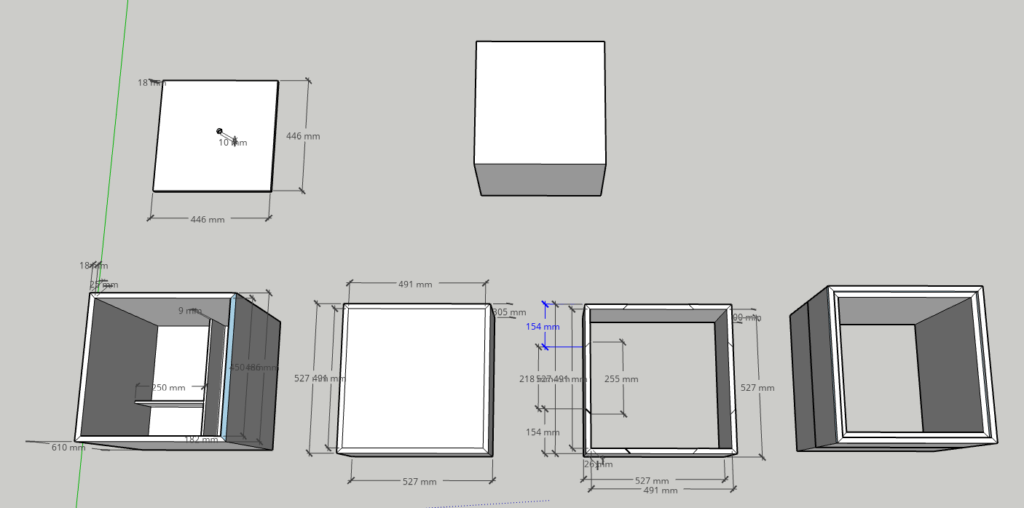
I designed a “Box” in SketchUp.

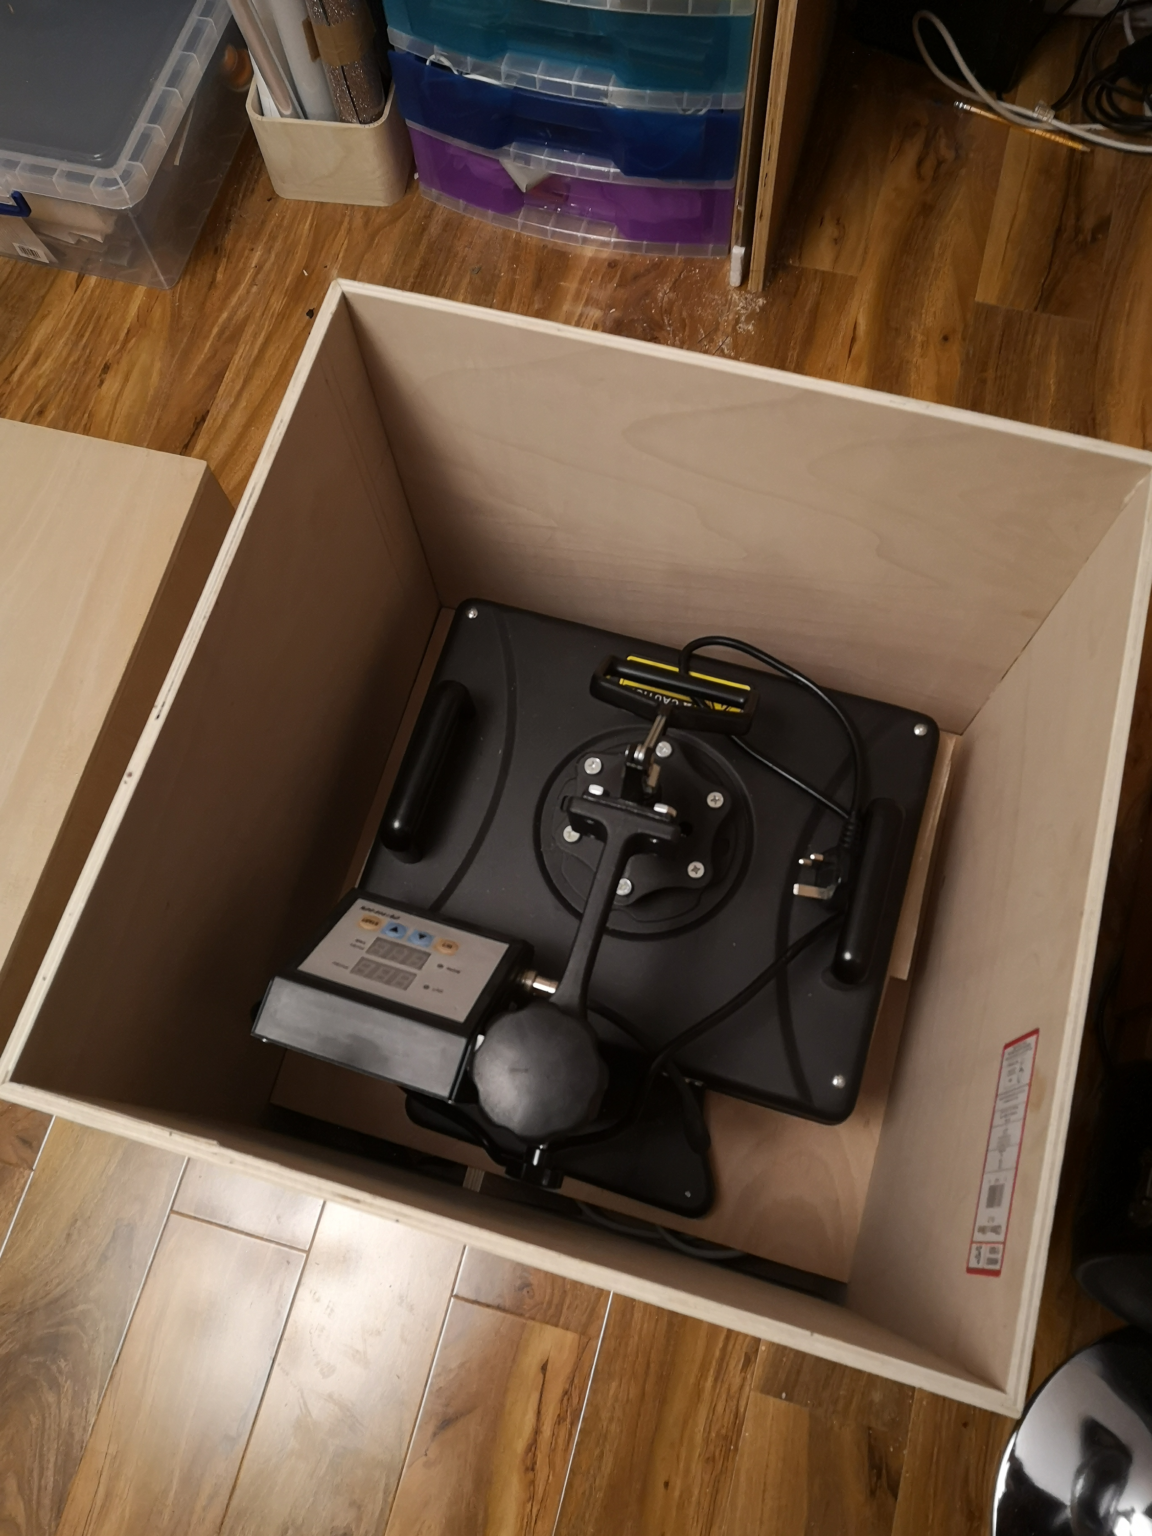
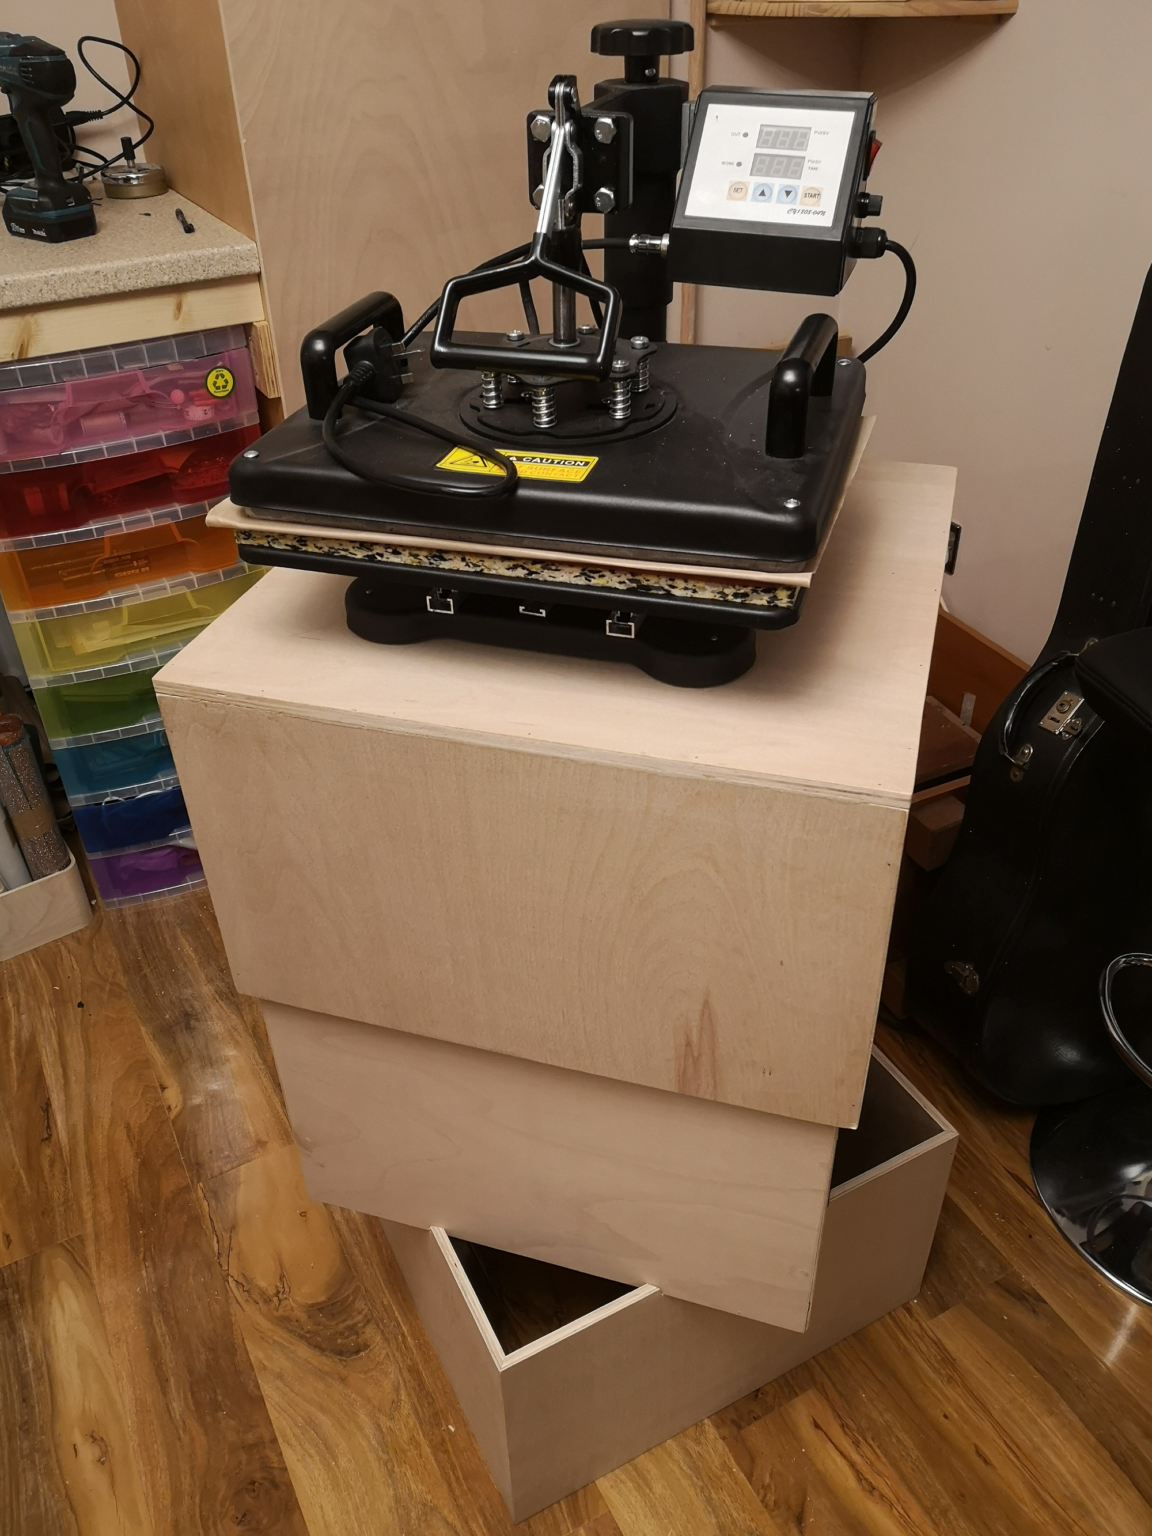
The box is to contain a print press machine that my wife uses to press her designs on fabrics (bags, hats, cups, t-shirts etc).

The box needed to be strong enough to hold the press while being used.

You can see from the SketchUp image, that the box “was” going to be 18mm ply but the lockdown and overall weight of the material was too much, so 12mm was used (manual adjustments made in head).

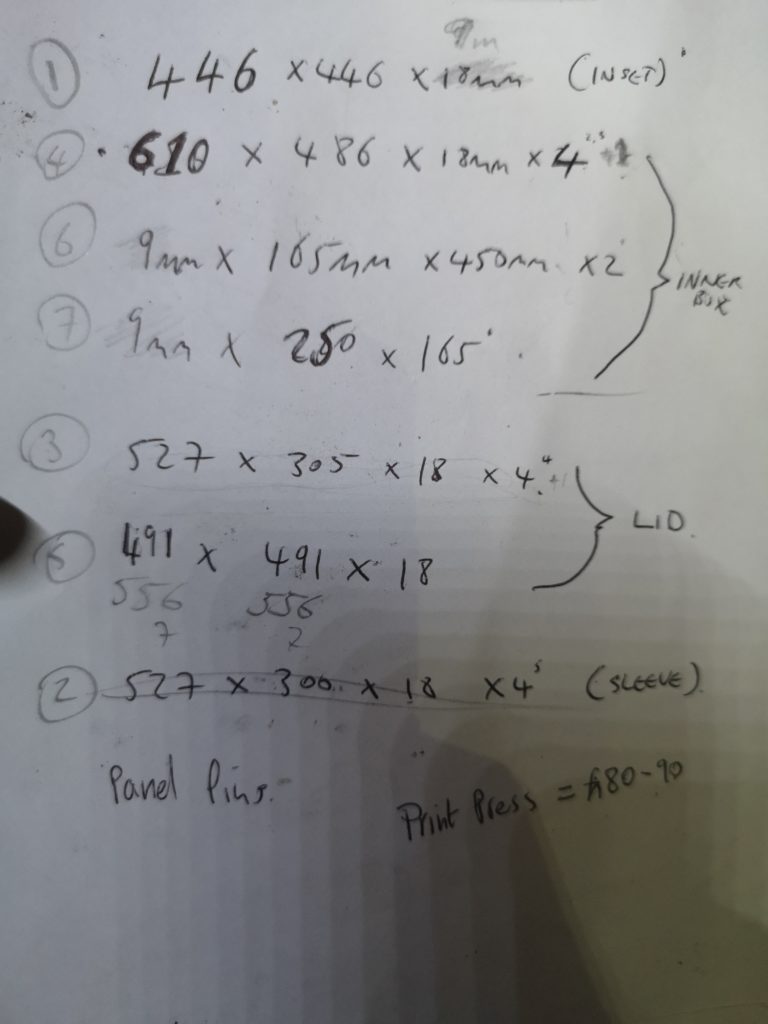
The original cutting list was written and various costs worked out before I stocked up with 18mm (I also got 12mm by chance while I was there).


The Make

The actual build isn’t something I thought to document with pictures.

What I can tell you is that all the box joining corners are cut at 45 degrees as this left not so much ply end grain (no I hadn’t seen Steves video on edging at that point).

If you look again at the bad image on sketchup, you can see that there is in fact three boxes here (Lower left of image is Inner, Right of that is Lid and Right of that is Sleeve.  Above Inner is the removable top / base for press parts compartments and press to sit on.

The random box, top right of image is my rough press template to size with and the far right shows the lid, sleeve and inner (minus final top and inner parts / bottom).

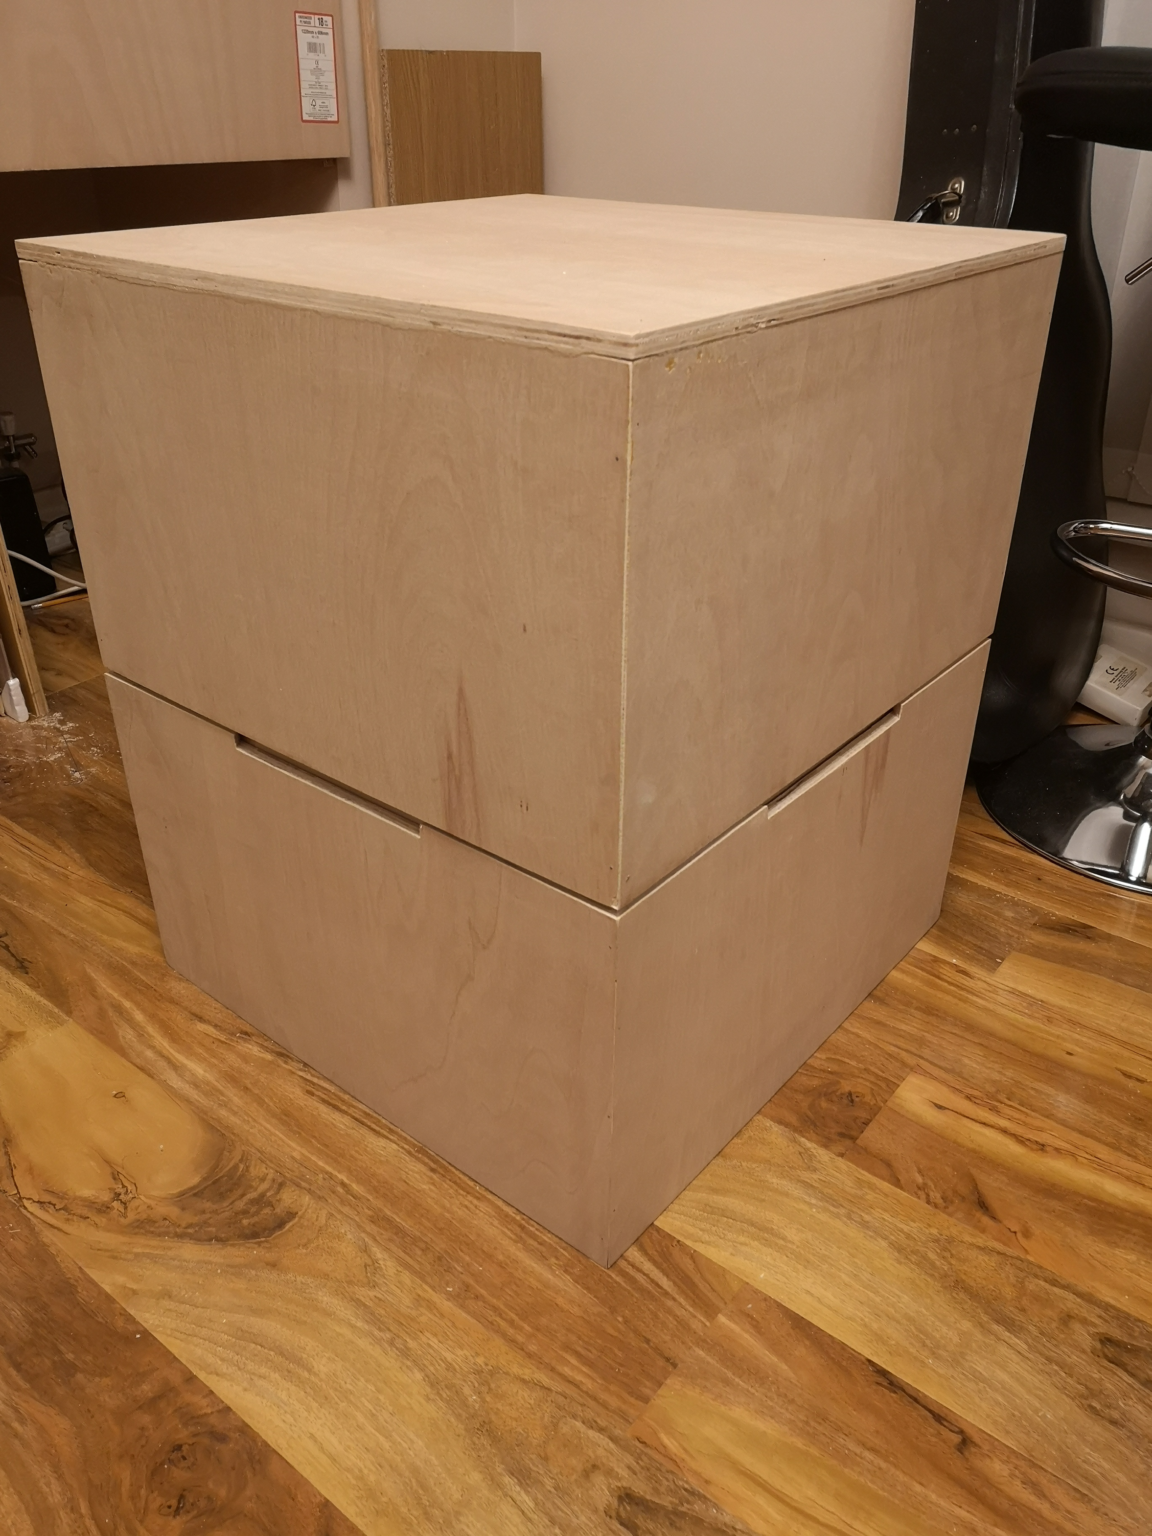
The Sleve isn’t a box and is a “notched” sleeve that creates the lower half of the overall closed box.  This goes around the inner box which is .5mm taller than the lid height overall and therefore creates a 5mm gap between the sleeve and lid parts when stored away.

Super difficult to explain in text but basically, its a box in a box with an oversized lid with doesn’t quite reach the lower “sleeve”.

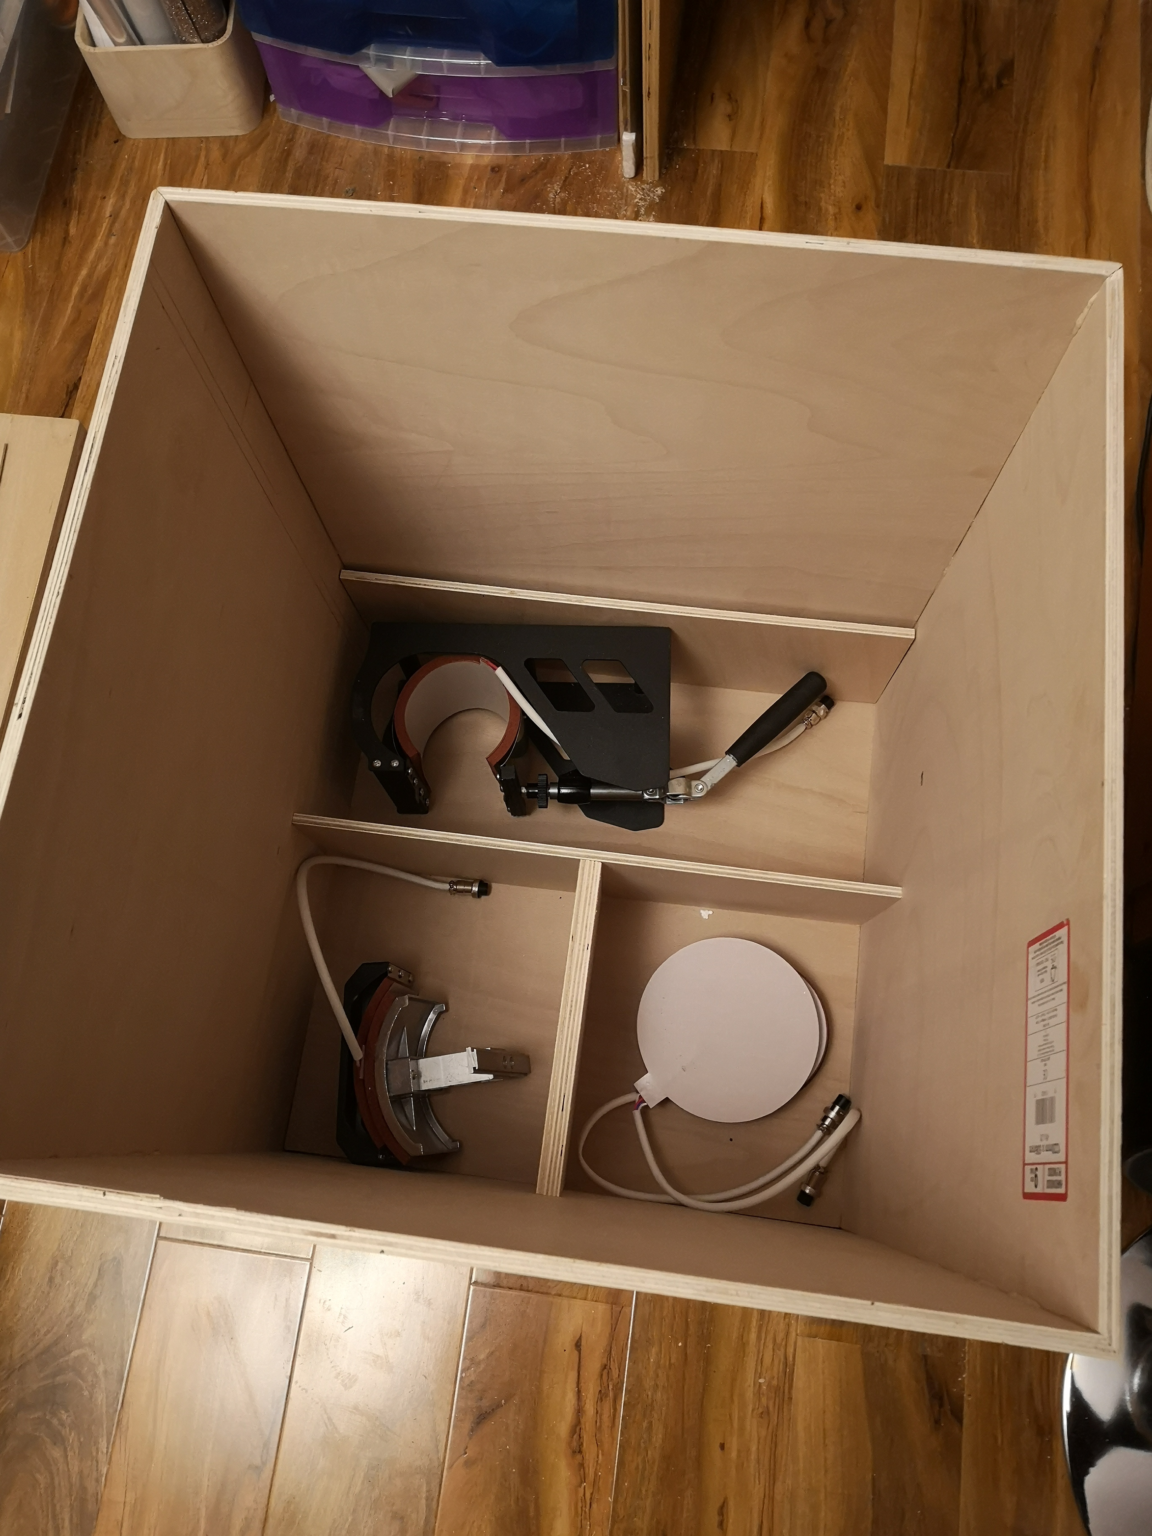
In the inner box, there are sectioned compartments for the presses attachments and a “false” top to that which is where the press sits on when packed away.  Phew!

I'm not a master craftsman

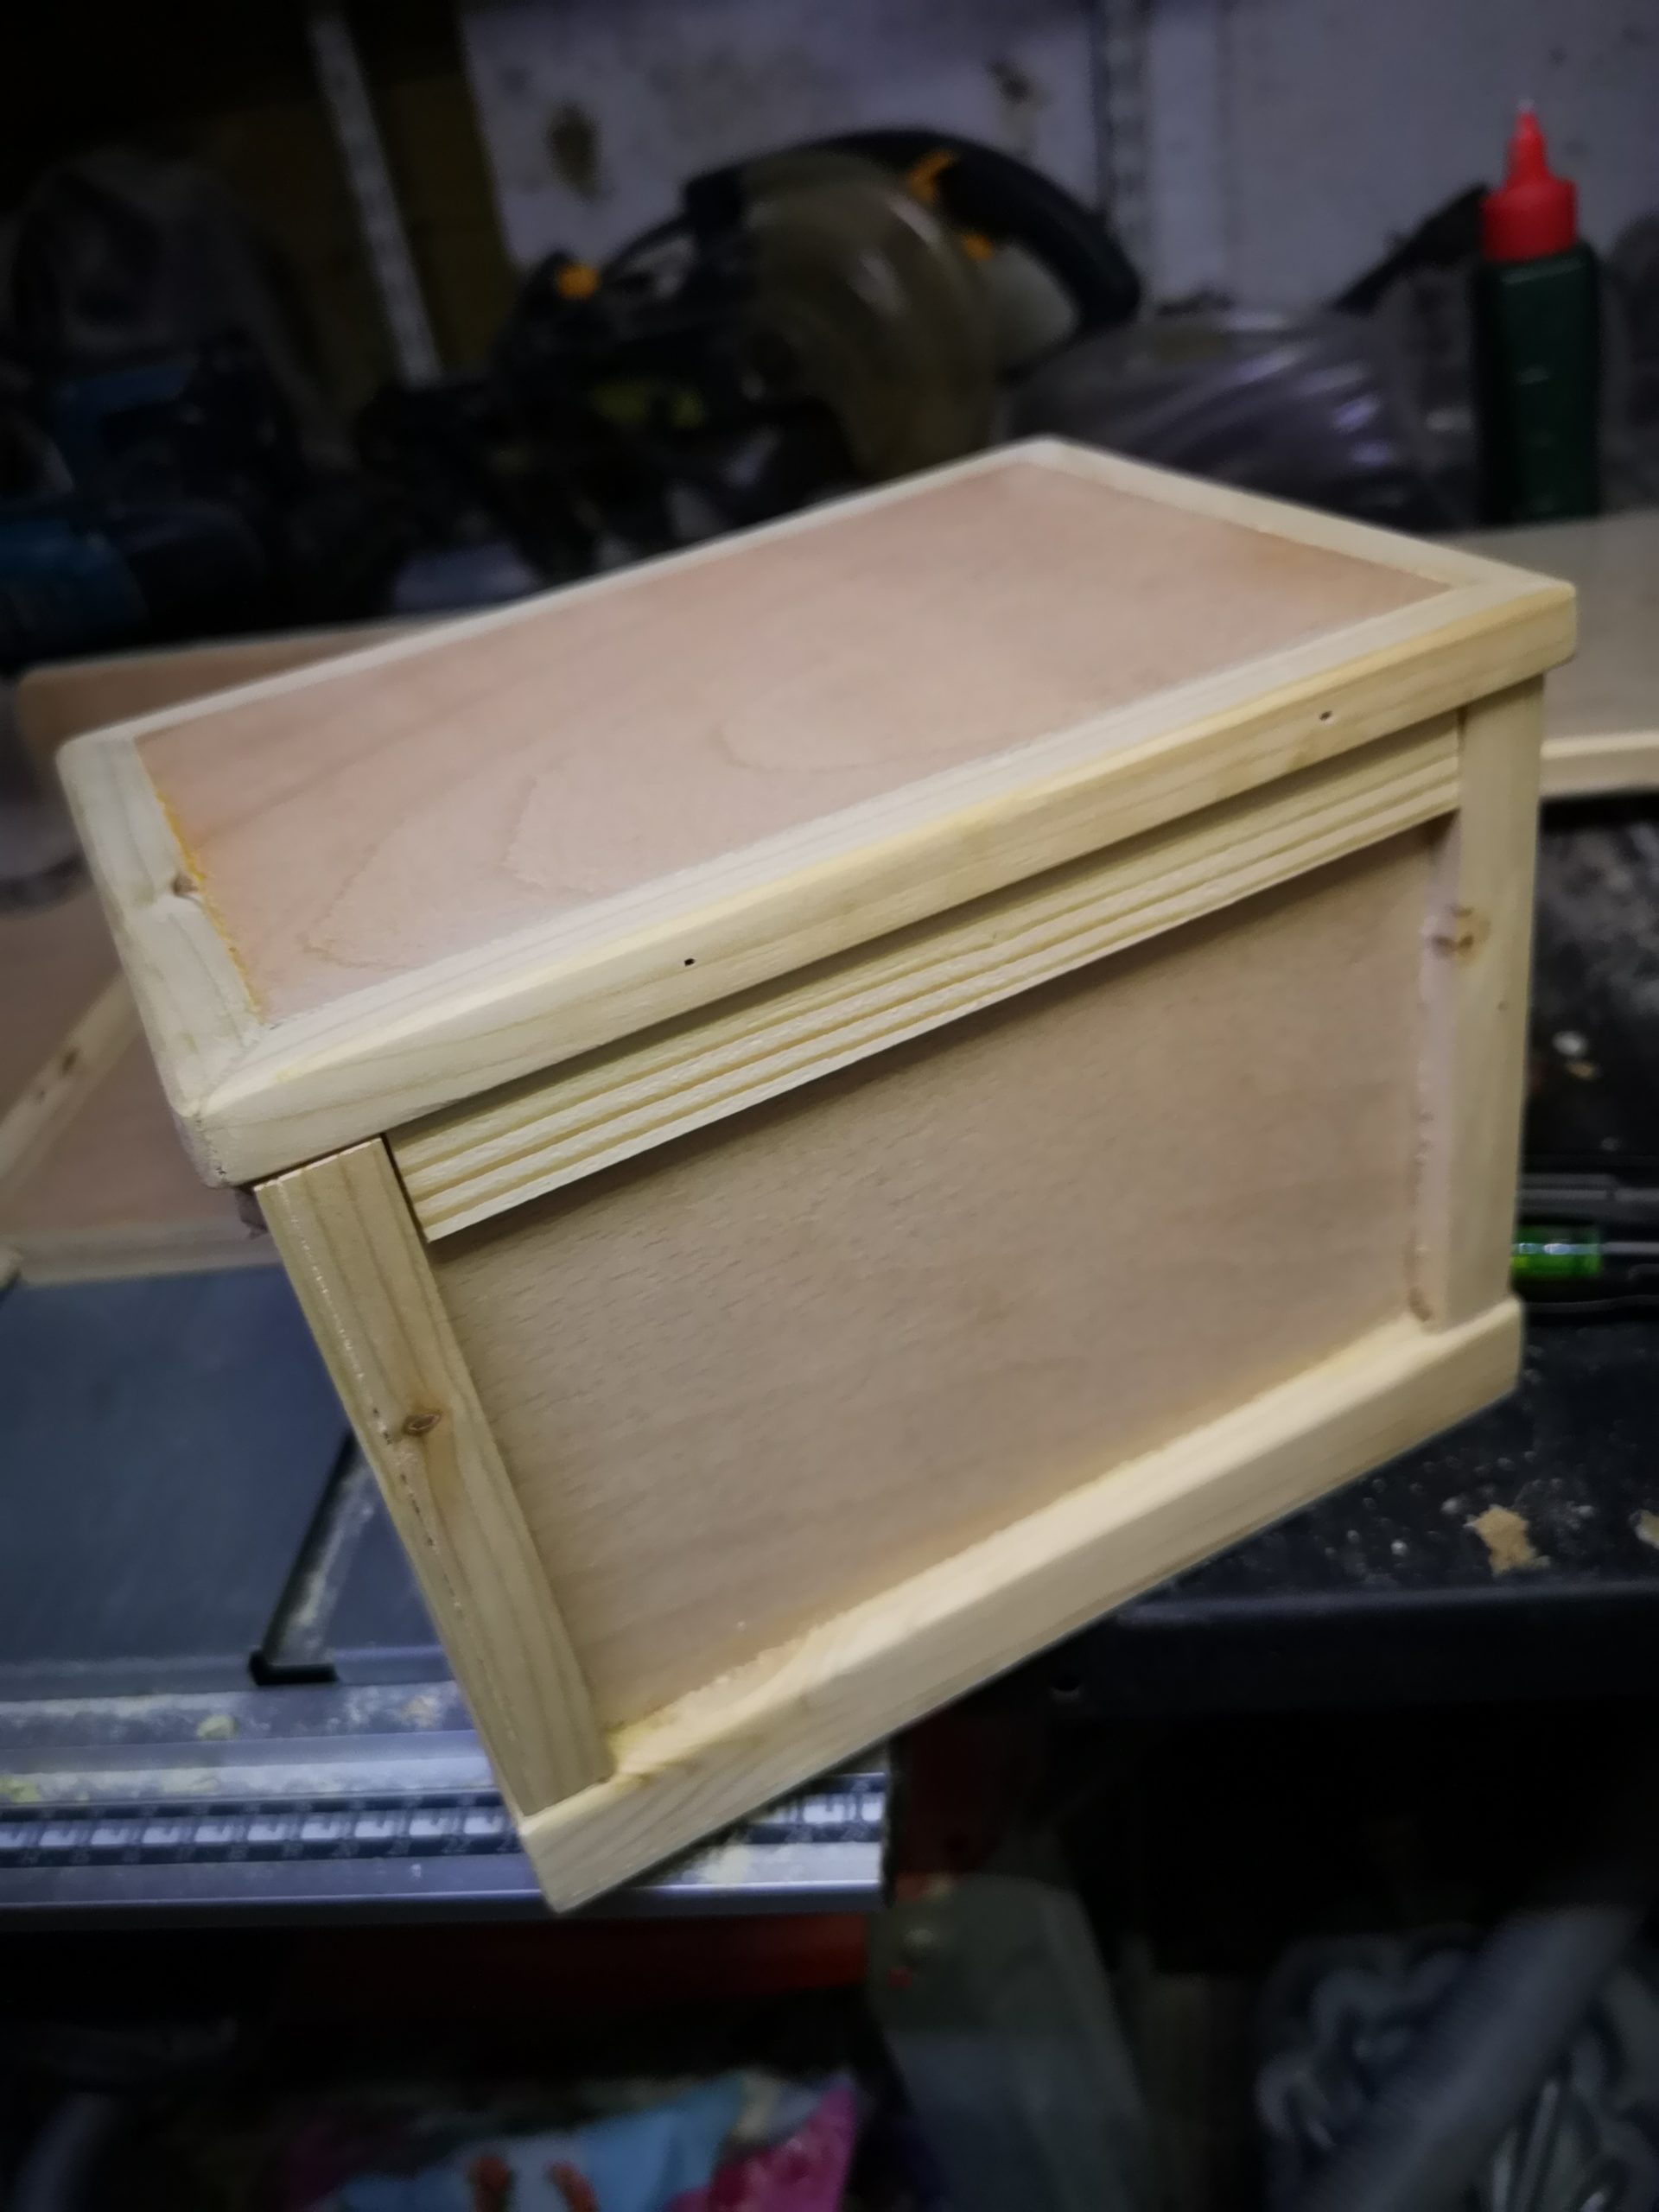
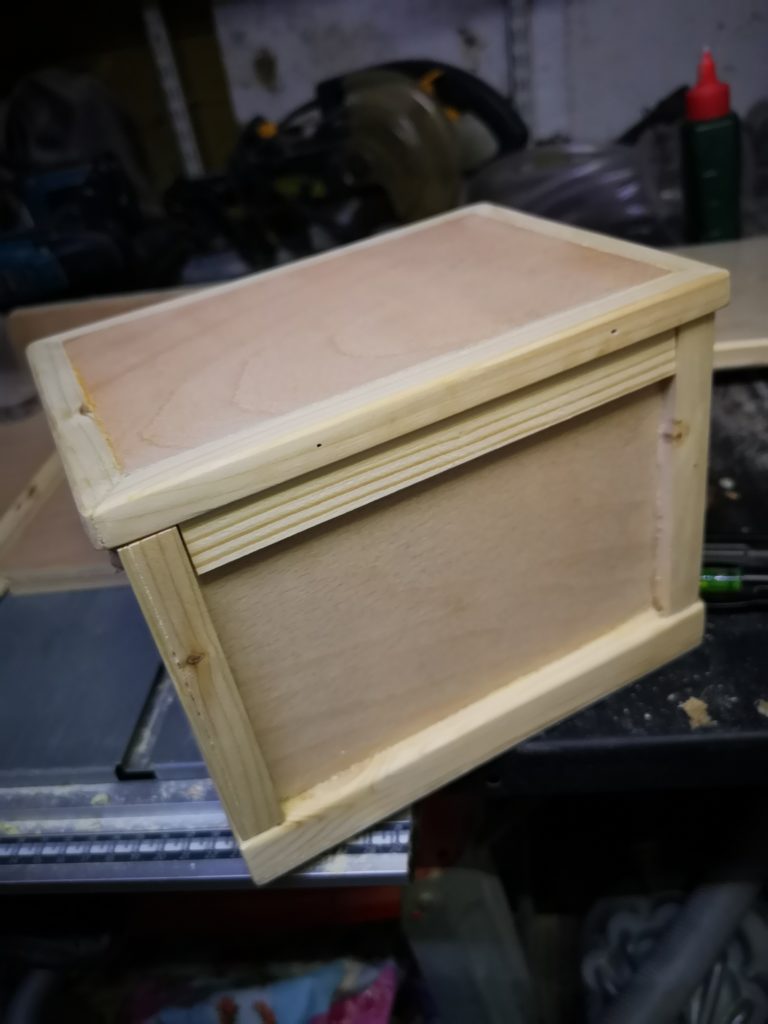
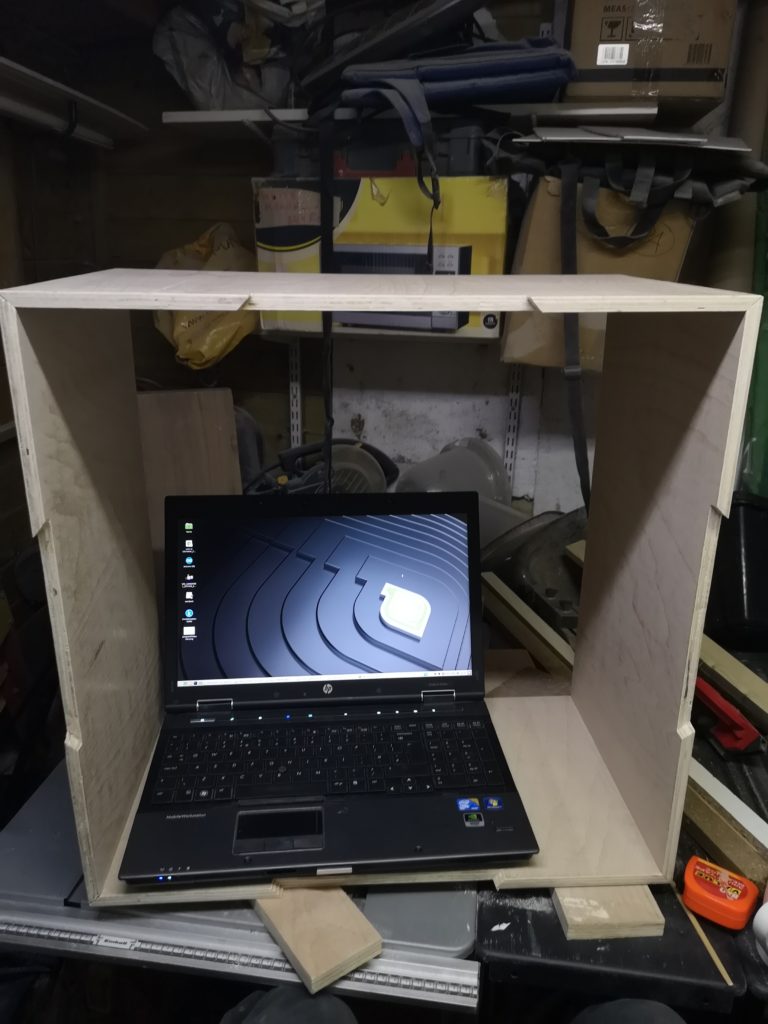
In the image above, you can see that the box is quite large (yes, that is on my tablesaw.  Yes, they are my knees.  NO, there isn’t more room to get out of the way and YES, the “workshop” is that small! 🙂

This is actually an image of the sleeve as I needed to sand down inside and apply some wax to help with friction as my little knowledge and clamp collection means that its not 100% square (keeping in mind the three boxes must slip over each other etc).

The Finished box (needs a "finish")

I hope you enjoyed your read through – Please join the mailing list to be notified of more random woodworking, making and general madness here at Linked2U.co.uk